Advanced Proportions Of The Face
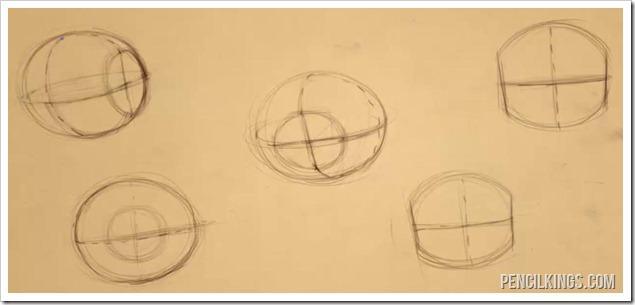
Understanding the Proportion Drawing Guides
To start off this lesson on face drawing proportions, let's take a look at the different lines that you've created on the sphere and what each of them means.
- The Horizontal Line – This line is going to become the brow line.
- The Vertical Line – This is the middle line of your face that the nose travels down and divides the right and left sides of the face. This line is also useful for finding the middle point along the back of the head if you are drawing your characters from the rear.
- The Side-to-Side Line – This gives you the mid point along the side of the head and helps place the ear.
- The Chopped Sides – These flat parts on the sides of the face is where the temple will go.
Face Drawing Proportions: Drawing the Hairline
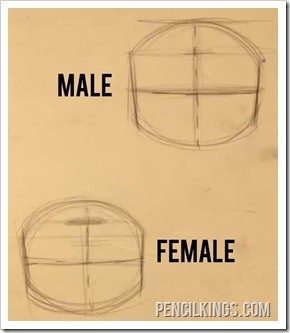
The basic hairline is slightly different for males and females, with the female hairline being slightly higher. As you study face drawing proportions, you can see the female hairline is a little bit higher in the example drawing to the right.
The position of this line can also change depending on who you are drawing, but for the basic purposes of face proportions for drawing the hair line should be a little bit above the mid line between the brow line and the top of the head.
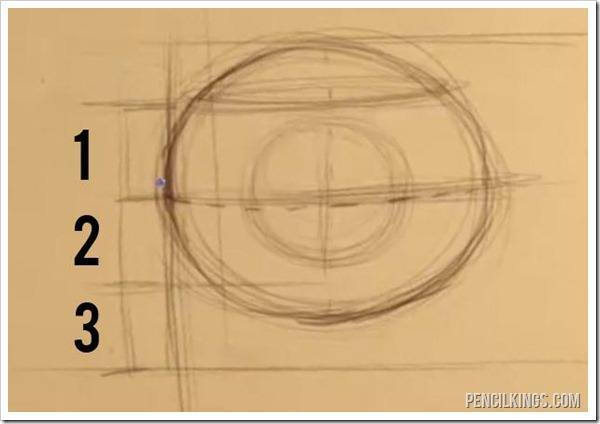
Drawing the Nose and Chin Proportion Guide Lines
If you take the distance between the brow line and the hairline that will give you the height of the forehead. The height of the forehead is the measurement that you will use to also determine the height of the nose and chin.
Draw a line coming down from the brow line off of the sphere for the front of the face. First take the height of the forehead, and then use that same distance and draw a guide line crossing the line that you drew for the front the face to create the nose.
Then, using that same forehead distance again, drop down one more time for the chin. When you break it down like this, face drawing proportions isn't so difficult after all!
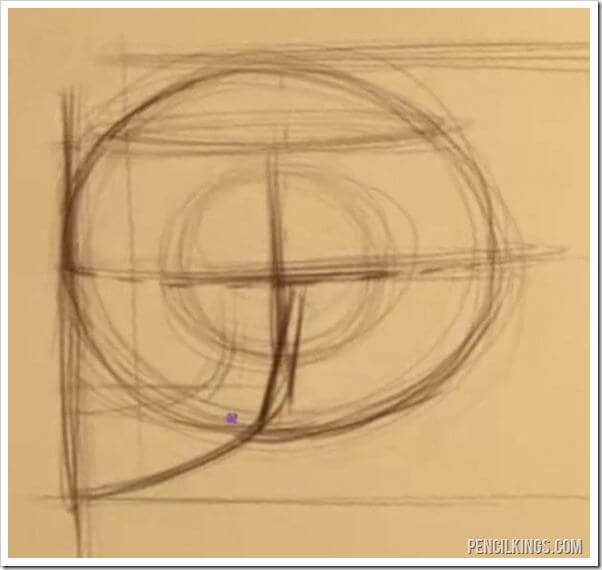
Drawing the Jaw Line
The jaw stars just a little bit behind the middle point on the side of the head where the horizontal and side-to-side guidelines meet. This line first drops down at a steep angle and then changes direction to curve towards the lowest point of the chin.
When you are learning face drawing proportions and drawing in your guide lines, you should follow the example in the video and draw through to find the corresponding part of the face on the other side of the head.
You can see this being shown in the three quarter view examples in the video when Sycra draws through to find the guide lines to create the jaw line on the opposite side of the face.
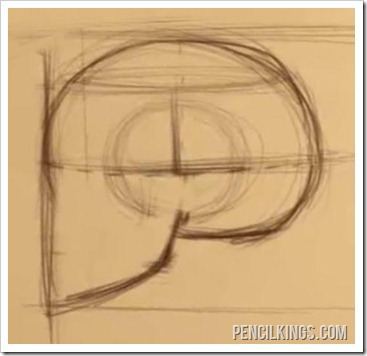
Drawing the Back of the Skull
The last thing to do here is to modify the sphere a little bit to get a shape that's closer to what a real skull looks like. In this side view image you can see that the bottom of the sphere has been chopped off a little bit, approximately at the same height as the nose.
If you're having a hard time seeing this in the image, just compare the lower back part of the skull in this picture and the one in the previous step.
In the next lesson on face drawing proportions you will begin to place the features on the face.
Return to the Face Drawing Proportions Lessons Page
Advanced Proportions Of The Face
Source: https://www.pencilkings.com/face-drawing-proportions-02-basic-proportions-of-the-face/
Posted by: baileyteplongues1974.blogspot.com

0 Response to "Advanced Proportions Of The Face"
Post a Comment