

How To Select Opposite In Photoshop
3 Ways To Invert A Selection In Photoshop
Sometimes you'll make a selection in Photoshop just to realize it's the opposite of what you wanted. If you didn't already know about how to invert a selection in Photoshop, you might have redone your entire selection. Rather than wasting your time remaking a selection, make life easy by inverting it with a simple keyboard shortcut!
With an active selection, use the keyboard shortcut Command + Shift + I (Mac) or Control + Shift + I (PC) to invert your selection area.
Now let's go into more detail about this process, plus a couple of additional ways to get the same result!
What Counts As A Selection?
Before you go and invert anything, you'll want to make sure you're actually inverting the right thing. So what counts as a selection?
A selection is anything with marching ants. Marching ants is a term for the little black and white line you create with different selection tools.
Things like the Quick Selection Tool, Marquee Tool, or Lasso Tool are prime examples of this.
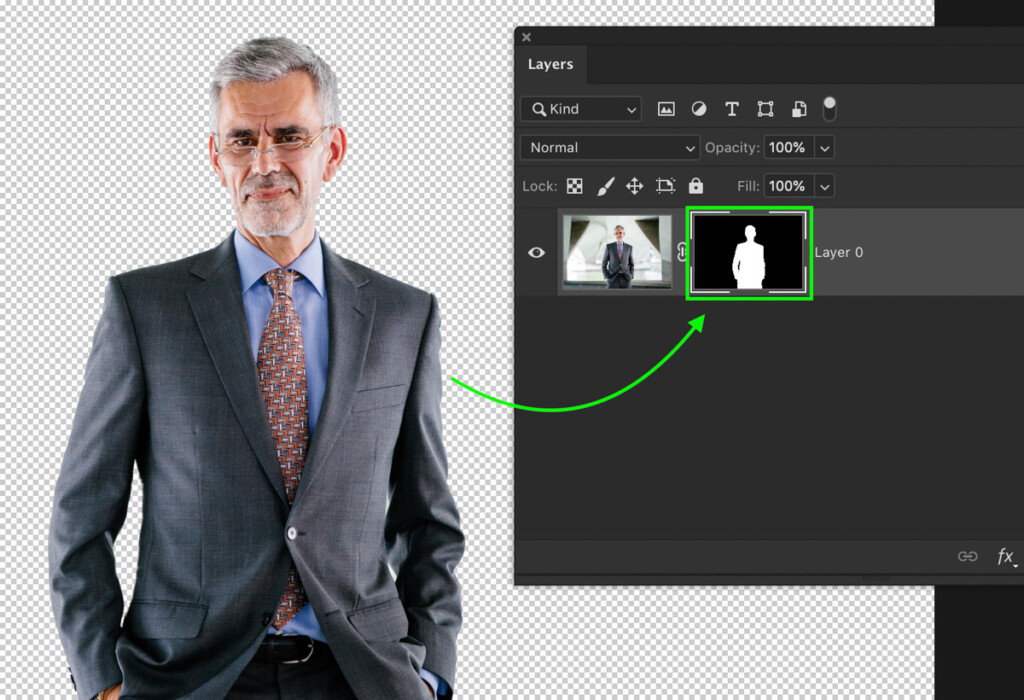
Selections help to tell Photoshop exactly which area you want to work with. You can cut out selections, apply them to layer masks, or use them as guides to make brush or clone adjustments.
The opportunities are limitless with selections. With that said, learning how to invert a selection in Photoshop is an easy way to save time.
How To Invert A Selection In Photoshop
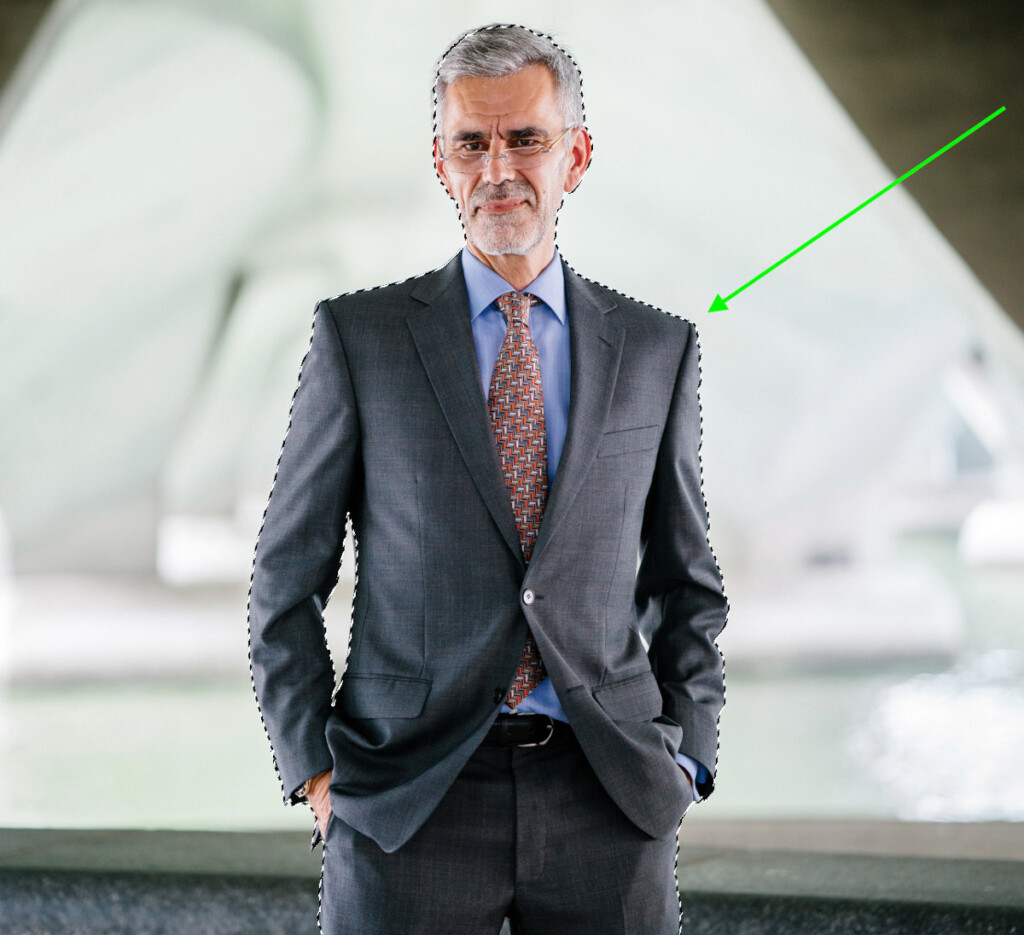
For the sake of example, I'll use my marquee tool to create a selection around the rectangle in this photo.
First, I'll grab my Marquee Tool (M) and click and drag to make my selection.

With the new selection active, you can now see the marching ants that represent the selection area.

By default, all selections in Photoshop affect the inside of the selection area. In this example, that means the darker orange and the wood will be included in the selection.

The active selection area
Everything outside of this will not be affected.
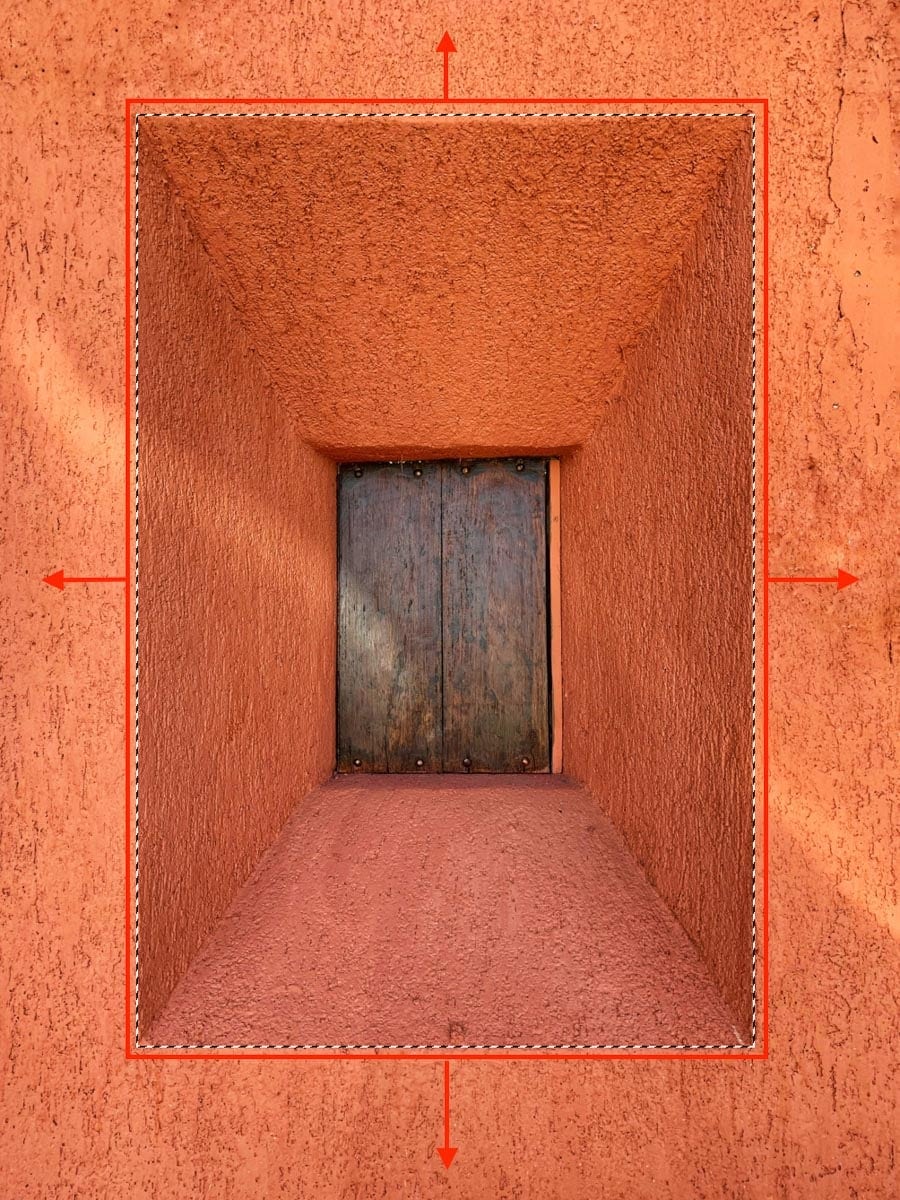
The inactive selection area
But what if you want the opposite of that? This is where inverting a selection becomes so useful.
Rather than creating a new selection, there's a simple keyboard shortcut you can use.
With your selection active, press Shift + Command + I (Mac) or Shift + Control + I (PC) to invert the selection. Now the lighter orange on the outside of the image is the only part that's selected.

How To Tell If Your Selection Has Been Inverted
At first glance, it doesn't look like much has changed. There's still the main marquee selection in the middle of the frame.
However, if you look to the outside of the canvas, there are now marching ants surrounding the edges. This means the selection has been inverted, and the selection area is between the two lines of marching ants.

To highlight what I mean, I'll add a hue adjustment layer to change the color with the selection.

Notice how the lighter orange has changed colors while the middle of the photo remains untouched.
What's The Point Of Inverting A Selection In Photoshop?
So what's the big deal? Why is it more useful to invert a selection in Photoshop instead of creating a new one.
In short, it saves a lot of time.
Rather than adding to your original selection, you can invert the selection in an instant. That way, you have the perfect selection from the get-go.
Particularly when adding a selection to a layer mask, it saves you from needing to invert the layer mask afterward.
Additional Ways To Invert A Selection
If keyboard shortcuts aren't your thing, there are more roundabout ways of inverting a selection. Here's how they're done:
The first option is to right-click on your selection and choose 'Select Inverse.'

This will invert your selection to the opposite of its current state. You can press this button multiple times to switch back and forth between selection areas.
The second option is done with the menu bar. With your selection active, go up to Select > Inverse.

Just like before, this inverts your selection and can be pressed multiple times to switch back and forth between selection areas.
Conclusion
With a simple shortcut, you've successfully learned how to invert a selection in Photoshop. Rather than wasting time to remake or adjust your selection, the inverse selection option swaps to the opposite selection area. This is the perfect thing to use when dealing with layer masks, or cutting out objects from your image!
Want more tutorials like this? Subscribe to my weekly newsletter for more photography and photo editing tips!
– Brendan 🙂
How To Select Opposite In Photoshop
Source: https://www.bwillcreative.com/how-to-invert-a-selection-in-photoshop/#:~:text=The%20first%20option%20is%20to,and%20forth%20between%20selection%20areas.
Posted by: baileyteplongues1974.blogspot.com
0 Response to "How To Select Opposite In Photoshop"
Post a Comment