

Do I Need Raspian For Motioeyeos With Raspberry Pi Camera Module
Raspberry Pi Os is the official operating system for a Raspberry Pi. Most kits include it by default, just when you need to reinstall it, yous might exist lost. In this article, I will prove you how to easily install Raspberry Pi Bone. To requite you an overview of this tutorial, hither are the required steps to install Raspberry Pi Os:
If you need assistance getting started on Raspberry Pi, I accept an entire course to guide you through your outset steps. I'll help you use the perfect hardware, plug everything in and install your first system. You'll also do your beginning projection with me, but to make sure you lot are gear up for the side by side level. Get all the information on this page if yous are interested.
Raspberry Pi OS introduction
Download the Pi Glossary!
If you lot are lost in all these new words and abbreviations, request my free Raspberry Pi glossary here (PDF format)!
If you are new to Raspberry Pi, I'll start with a brief introduction to Raspberry Pi OS.
Presentation
Raspberry Pi OS is a Linux distribution based on Debian.
It'due south the official distribution for Raspberry Pi.
Formerly named "Raspbian", it was renamed "Raspberry Pi OS" in 2020.
Raspberry Pi OS follows the names of the Debian versions, so the latest version available is Raspberry Pi OS Bullseye (Debian 11). Raspberry Pi OS is optimized for Raspberry Pi and you can utilise this distribution for most projects.
Versions
Raspberry Pi Bone is offered in three "versions":
- Full: Raspberry Pi Os with desktop and recommended software.
- Desktop: Raspberry Pi OS with desktop.
- Lite: Minimal paradigm for Raspberry Pi OS (no interface, command line only).
As its proper name suggests, the first 2 offer a graphical environs (PiXeL), while the third comes without (just it will however exist possible to add it afterward).
If you are new to Linux, I recommend starting with the desktop or full version, so that you can familiarize yourself with the commands.
Throughout this article, I volition explain how to install these two versions of Raspberry Pi OS.
The installation of the Full or Desktop version is the aforementioned process, I volition call it "Desktop" just, only it's for both. Whatever your pick, you volition know how to do all the steps described.
Prerequisites to Install Raspberry Pi OS
To follow this commodity, you will need:
- An Internet connection.
- A figurer to download and flash Raspberry Pi OS.
- An SD carte du jour reader (USB or built-in reckoner).
If you don't have one on your computer, yous can get a USB adapter similar this 1 on Amazon. - A minimum 8 GB SD card.
The best is this one, you tin find a criterion I did with the most pop SD cards here. - A micro-SD / SD adapter (often included with the SD bill of fare).
- A complete Raspberry Pi setup, with screen and keyboard, to install it in the best possible weather condition.
I'm using a Bluetooth keyboard all the fourth dimension, and I'm loving information technology (cheque it on Amazon).
Download Raspberry Pi OS
There are two chief ways to install Raspberry Pi OS on your SD card:
- Use Raspberry Pi Imager: The tool created by the manufacturer, that will do everything for yous.
- Use Balena Etcher: You'll need to download the system image first, and flash it with Etcher.
Both techniques work well, but if you are reading this, y'all might exist a beginner in this field, and so I recommend going on with the first option.
You'll observe many articles on this website where I explain how to practice this with Etcher, simply for now, let'south use Imager.
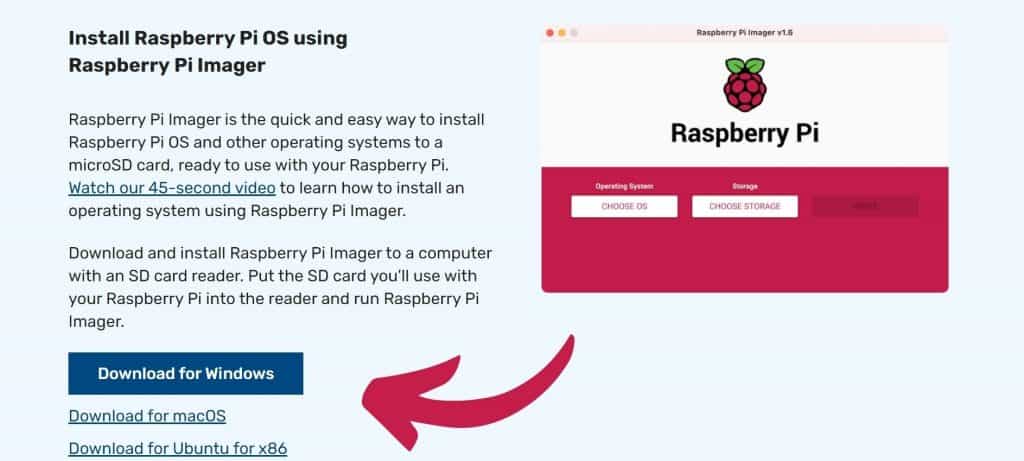
Download Raspberry Pi Imager
Raspberry Pi Imager is bachelor on the official website. They are pushing this solution, so it'll be easy to find.
Hither is the direct link.
Install Raspberry Pi Imager on your Reckoner
Once downloaded on your computer, install it similar any other application.
For Windows users, double-click on the downloaded file and follow the instructions to install it. Keep the default values if you have a choice.
The tool volition and then be available in the primary menu (or in your applications for other operating systems). Showtime it and you'll be ready to move to the next pace.
Flash Raspberry Pi OS on your SD menu
Raspberry Pi Imager has an interface that is pretty easy to utilize. There are three main steps:
- Choose the operating system you desire to install.
- Cull the SD card or USB device to use.
- Beginning the writing process.
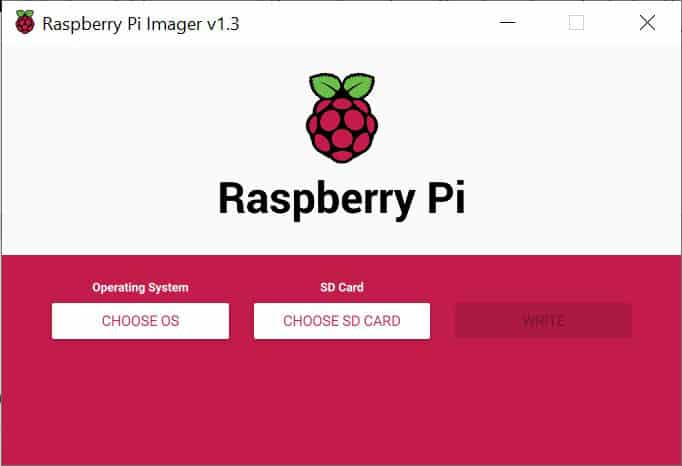
Follow these three steps to create your SD carte du jour:
After a few minutes, your SD card will be ready.
If your operating system opens empty drives or format questions, y'all must ignore everything.
Imager will do everything. You lot have zero else to do.
Later on the writing procedure, you can see on the moving-picture show, there will be a verifying process to ensure your SD card is not corrupted and that everything will work correctly.
Raspberry Pi Bootcamp
Sale: 10% off today.
Take it to the adjacent level.
I'm hither to aid you get started on Raspberry Pi.
Learn all the skills yous need in the right order.
Note: The first time (or if an update is available), Raspberry Pi Imager will download the latest paradigm in the background, that's why information technology might be tiresome depending on your Internet connection. But if you flash another SD card with the aforementioned Bone, the image will exist cached, and it won't download it once more.
First boot on Raspberry Pi OS
Insert the SD carte du jour
Get your SD card and insert information technology into your Raspberry Pi.
Then beginning the Raspberry Pi, with a screen and a keyboard plugged.
Your device may reboot a few times, don't panic, this is normal.
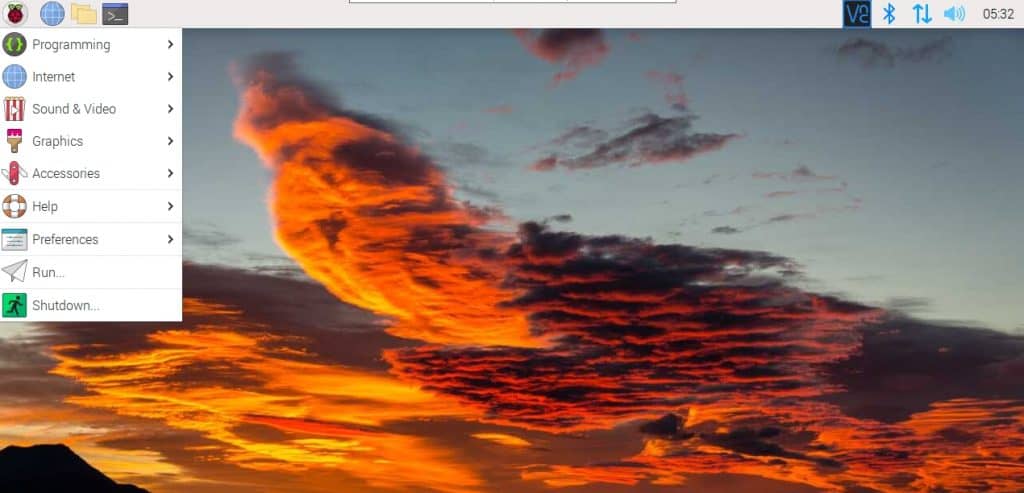
Desktop version
When you start on the desktop version for the showtime time, there is zilch to do.
The system automatically logs in and introduces you to a welcome wizard:
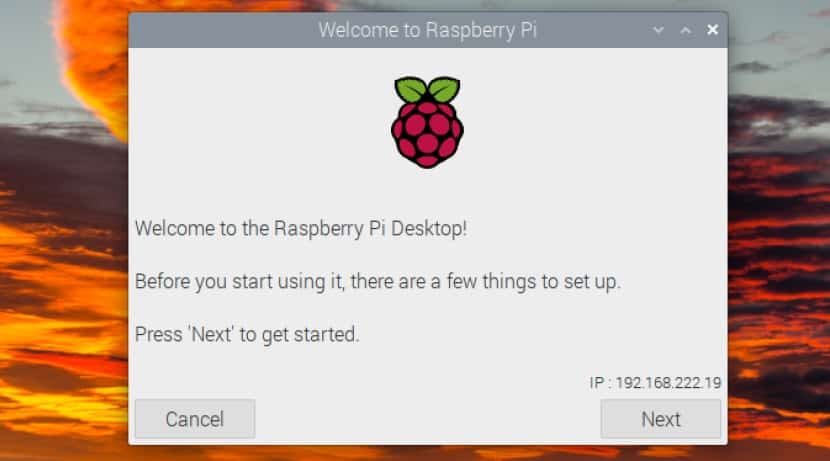
Follow the wizard to configure the main settings:
- Select your land and alter the default language.
- Modify the password.
- Connect to the Wi-Fi network if needed.
- Showtime arrangement updates.
Wait for the updates to terminate and restart the Raspberry Pi.
Note: With the latest versions of Raspberry Pi Os, the welcome wizard is now showing up before opening the session. You demand to create the beginning user and password before anything else:

The other steps are the same as explained previously.
Lite version
On the Lite version, you have cipher to do at offset boot.
The system will offset alone until the login screen.
Log on with the default user:
- Login: pi
- Password: raspberry
The keyboard is in QWERTY (en-u.s.a.) by default.
If y'all have a keyboard with another layout, you have to reverse the messages (rqspberry in AZERTY for instance).
Nosotros will see later how to suit this.
Annotation: Aforementioned thing as with the desktop version, information technology's now required to create the first username and countersign on your offset boot.

Raspberry Pi Bone configuration
Keyboard layout
The outset matter you need to do is to choose the right layout for your keyboard (if not already prepare).
Desktop version
Generally, if you used the Welcome Wizard, your keyboard must already be configured accordingly.
Nonetheless, if yous demand to change it. Yous tin can do it in:
- Main menu > Preferences.
- Open "Raspberry Pi Configuration".
- Localisation tab.
- Set Keyboard…

The change should apply immediately, restart your apps if needed.
Calorie-free version
On the lite version, utilize the raspi-config tool: Start the raspi-config tool
sudo raspi-config
- Get to Localisation Options:
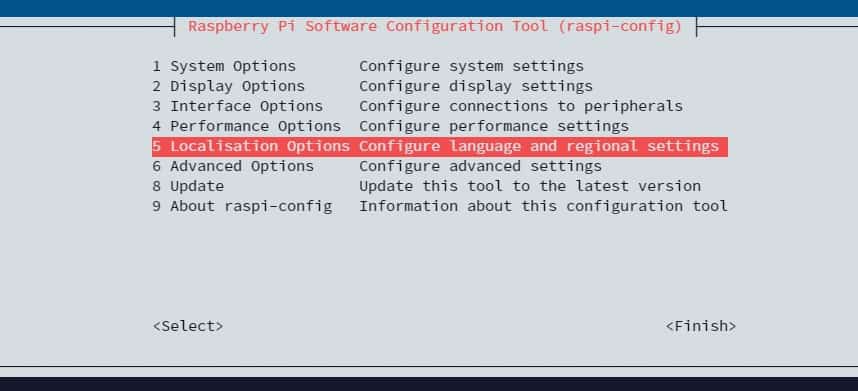
- Then Keyboard Layout.
- Select the model of your keyboard (leave default if not institute).
- So select the layout of your keyboard (or other to have the choice of other countries, and so the specific layout of your country).
Subsequently that, you will have other options for special keys (alt gr, compose key, etc…).
It'south not the most of import considering with a Raspberry Pi OS Low-cal yous will use SSH most of the time (from another estimator well configured).
You lot tin go on default values if you lot are not sure.
After saving your changes, verify that your keyboard is typing what you want and continue.
Raspi-config is a great tool you can use from your Raspberry Pi directly, simply also when continued by SSH.
It allows y'all to configure many organization options with a simple interface.
Change the Default Password on Raspberry Pi OS
Desktop version
As well, the welcome wizard has already immune y'all to practise it.
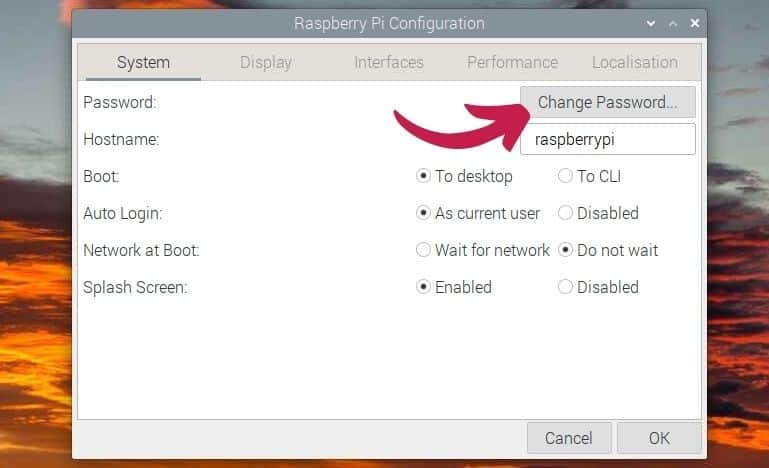
If you need to change information technology again, you lot can exercise it this way:
- Become to the primary menu.
- Go to Preferences.
- Launch Raspberry Pi Configuration.
- In the System tab, click on "Change Countersign".
Lite version
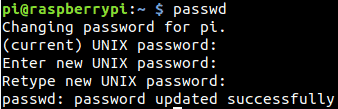
On the lite version, you can follow these steps:
- Enter the password control:
passwd - Blazon the old password (raspberry).
- Enter a new countersign.
- Confirm the same new password.
It's ok. Y'all should get something like:
Are you a bit lost in the Linux control line? Bank check this article first, for the most of import commands to remember, and a costless downloadable cheat sheet and so you lot can have the commands at your fingertips.
Network configuration
If you tin can connect your Raspberry Pi to a network cable with DHCP, the setting will be instantaneous, and you accept zippo else to do.
In other cases, let's see what you lot need to do.
Desktop version
Ethernet
If yous demand to change your IP accost, you tin right-click on the network icon in the top bar.
Then cull "Wireless & Wired Network Settings".
On the new window select your interface (eth0 or wlan0) and make full the class with your network settings.
It should be something like this:

Wi-Fi
Master your Raspberry Pi in 30 days
Sale: ten% off today.
Download the eBook.
Uncover the secrets of the Raspberry Pi in a 30 days claiming.
Learn useful Linux skills and practice multiples projects.
If you haven't already called your Wi-Fi SSID in the welcome magician, you can connect to information technology by clicking on the network icon in the top bar.
A listing of all detected SSIDs will show up, select yours and enter your password.
If you lot demand more details, you can read this commodity on how to configure the Wi-Fi on Raspberry Pi.
If you demand to set a static IP address, y'all can do it the same way as for the Ethernet.
Choose wlan0 in the Network Preferences window.
Lite version
Ethernet
I volition give you two methods.
The first one is the one recommended, but in my case, it didn't work.
The second is the one that finally allowed me to have a static IP.
The official way to prepare a static IP:
If you demand (or want) to set a static IP address on your network, follow these steps:
- Edit this configuration file:
sudo nano /etc/dhcpcd.conf - Add together these lines at the finish of the file (don't forget to supercede this with your network settings):
interface eth0 static
ip_address=192.168.one.200/24
static routers=192.168.one.1
static domain_name_servers=192.168.ane.one - Save the file and leave (CTRL+O, Enter, CTRL+X).
- Reboot the Raspberry Pi for changes to take result:
sudo reboot
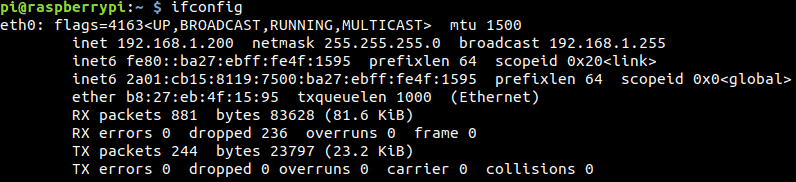
After the reboot, your IP should be fixed. Check it with the command ifconfig.
Some other fashion to practice the same thing:
Follow these steps:
- Uninstall dhcpcd:
sudo apt-get remove dhcpcd5 - Edit the /etc/network/interfaces file:
sudo nano /etc/network/interfaces - Paste these lines into:
auto eth0
iface eth0 inet static
address 192.168.1.200
netmask 255.255.255.0
gateway 192.168.1.one
dns-nameservers 8.8.viii.8 viii.8.four.4
Don't forget to edit the values with your network settings (gateway is the router IP, and you can keep these IPs every bit DNS servers) . - Save the file and exit (CTRL+O, Enter, CTRL+X).
- Reboot the Raspberry Pi:
sudo reboot
You should get something like this:
Wi-Fi
To enable the Wi-Fi on the Calorie-free version, yous should showtime set up your Wi-Fi land.
For this, use the raspi-config tool.
sudo raspi-config
- Go to Localisation Options > Change Wi-Fi Country.
- Select your Country in the list.
- Go out.
Once you lot gear up the country, y'all can start raspi-config once more to set up upwardly your Wi-Fi connexion:
- Get to Network Options.
- Cull Wi-Fi.
- Enter your network SSID.
- Enter your passphrase.
- Terminate.
Enable SSH
SSH is a protocol that will permit you to connect to your Raspberry Pi from another estimator to be able to launch commands and scripts.
Desktop version
Start once
To start SSH server follow these steps:
- Open the Master menu.
- Start Preferences > Raspberry Pi Configuration.
- In the Interface tab, enable SSH.
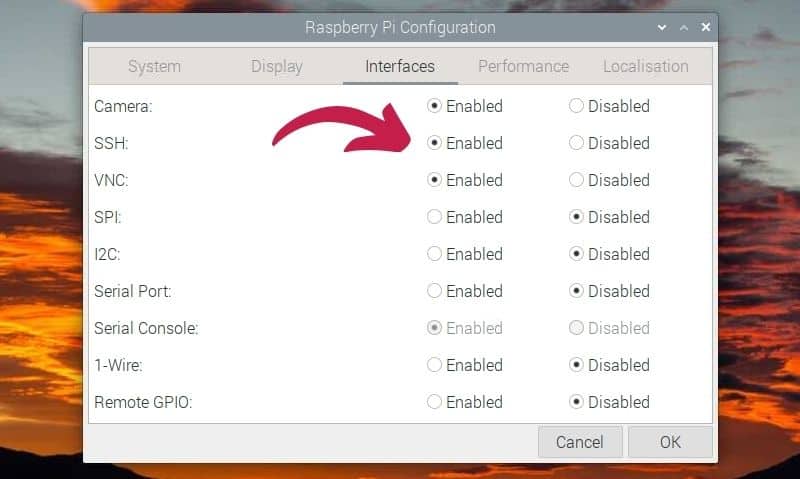
Motorcar kickoff
On the Desktop version, SSH server will machine-first at each kick until you disable it in this window.
Lite version
Kickoff once
On the calorie-free version, you tin can get-go the SSH server with this command:
sudo service ssh kickoff
Auto-offset
sudo update-rc.d ssh defaults sudo update-rc.d ssh enable
Connection
Once the SSH server is enabled, y'all can connect from any computer on the local network.
You can even open a port in your firewall/box to access it from the Cyberspace.
If y'all don't know how to use SSH, you will find the data in the first paragraph of this article.
Install new packages
The base of operations of your Raspberry Pi Os system is now in identify.
You must then install all the software you demand.
The most basic software is bachelor in Raspberry Pi Bone repositories, let's run into how to practice it in both environments.
Desktop version
With the Desktop version, a graphical tool allows you to manage packages:
- Open the main menu.
- Go to Preferences.
- Click on Add / Remove Software.
A window opens:
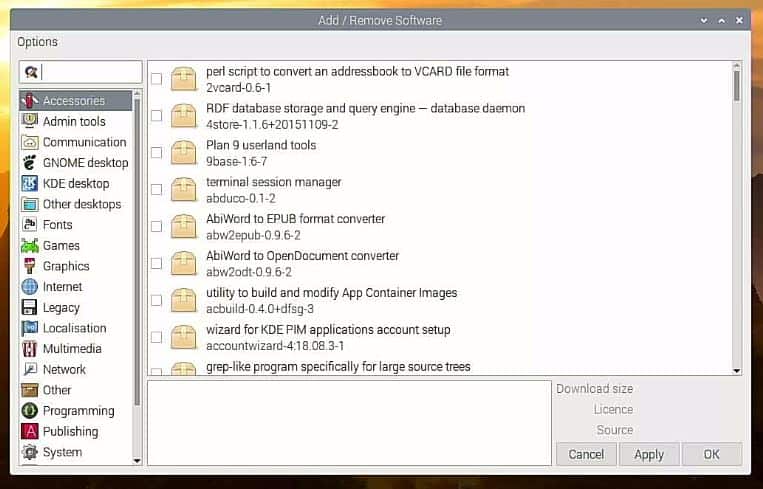
This tool allows you to view all packages bachelor for Raspberry Pi Bone, sorted by category.
A search engine is too available.
To install a new package, simply cheque the respective box.
Then ostend by clicking OK on the bottom right.
When a packet is selected, a brusk clarification appears in the bottom frame.
To remove a parcel, uncheck the box respective to the bundle y'all want to uninstall.
Don't know what to install? Here are my favorites applications for Raspberry Pi OS.
Lite version
Master Python on Raspberry Pi
Auction: 10% off today.
Get the eBook.
Do more with your Raspberry Pi, learn the useful concepts and take the shortcuts.
Yous miss half of the fun of using a Raspberry Pi if you don't know anything about Python.
In the Lite version, in that location is no interface, so you will have to acquire some commands.
The apt-become and apt-cache commands allow you to manage package installation.
Find the verbal name of a package:
apt-cache search [TEXT]
Hither is an case:

There are many optional parameters you can utilise, for example -n will search only in package names (and then no adminer in the results).
Install a package:
Once yous go the verbal name for the parcel you desire to install, use apt-become to install it:
sudo apt-go install [Parcel-NAME]
Here is an example:
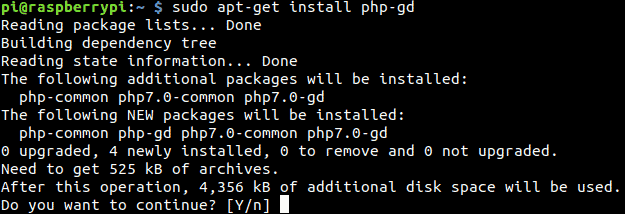
Hit enter to install the packet and its dependencies.
Delete a package:
If you desire to uninstall a bundle, use this command:
sudo apt-go remove [Parcel-NAME]
Here is an example:
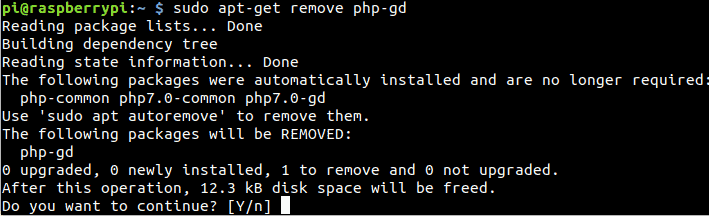
As you tin can see, apt-get volition remove the bundle you inquire for, but not its dependencies.
If you lot desire to remove them, you lot have to use this command:
sudo apt-get autoremove
Video
If you desire to see a summary of all the outset steps to install Raspberry Pi OS (Raspbian) on your Raspberry Pi, you can watch this video:
And you can subscribe here to receive the new videos almost Raspberry Pi:
Related posts
Before finishing this article, here are some articles that may interest you lot.
These are pretty simple things to set up, and that you may demand after installation is complete:
- Find the current IP of your Raspberry Pi
- Change desktop appearance
- SSH tutorial for Raspberry Pi
- Remote desktop on Raspberry Pi
Reminder: Retrieve that all my Patreon supporters get admission to this website without ads, early admission to my videos and much more. You tin can become part of this community for as little as $3 per month & get all the benefits immediately.
Conclusion
Go My Cheat Sheet!
Grab your free PDF file with all the commands y'all need to know on Raspberry Pi!
You now know how to install or reinstall Raspberry Pi OS on a Raspberry Pi, and the first things to practice once the installation is complete.
Raspberry Pi Os is the basis of most projects, now you accept to choose 1 project and gear up it up 🙂
Raspberry Pi Resources
Not sure where to start?
Understand everything about the Raspberry Pi, finish searching for assist all the time, and finally enjoy completing your projects.
Lookout the Raspberry Pi Bootcamp class now.
Primary your Raspberry Pi in 30 days
Don't want the basic stuff only? If you are looking for the all-time tips to get an skillful on Raspberry Pi, this book is for you. Acquire useful Linux skills and practise multiple projects with stride-by-step guides.
Download the east-book.
VIP Community
If y'all just want to hang out with me and show your support, you tin also join the Patreon customs. I share behind-the-scenes content at that place and requite yous early on access to my content. You'll also go a shoutout when you join.
More details here.
Need help building something with Python?
Create, understand and improve whatever Python script for your Raspberry Pi.
Acquire the essentials, step-by-pace, without losing time understanding useless concepts.
Get the e-book now.
You lot can also detect all my recommendations for tools and hardware on this folio.
Source: https://raspberrytips.com/install-raspbian-raspberry-pi/
Posted by: baileyteplongues1974.blogspot.com
0 Response to "Do I Need Raspian For Motioeyeos With Raspberry Pi Camera Module"
Post a Comment